


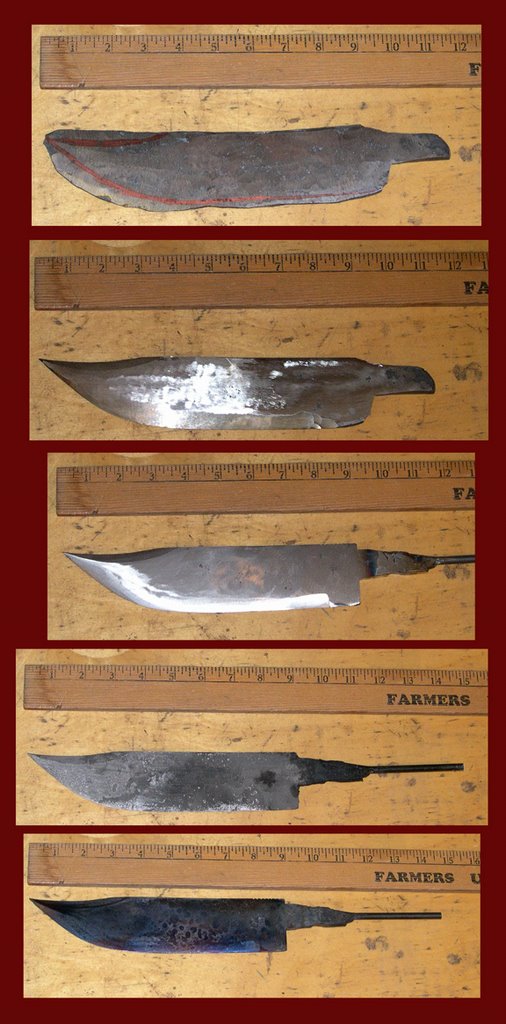
 Well the long-awaited day has arrived. The Hicks knife is finished but for the sheath and I must say I'm rather pleased with it. The brass in the handle gives the back end of it a nice heft and evens out the balance of the blade (1/4+" thick). The first series of pictures show the blade progressing. At top is the rough forging with the fire-scale ground off and the profile marked. Next, the blade rough-ground. Along with being finish filed in the following, a piece of 1/4" mild steel round stock is welded onto the tang. The voice of hard experience says life is just too short to attempt peening a high-carbon tang on any consistant basis. The final photos show the blade, just out of the oil quench and then tempered. At this point, although it's not clear in the picture, the tempering colors haven't been sanded off. Ideally, the spine is annealed back to gray-blue while the edge is left between straw and purple.
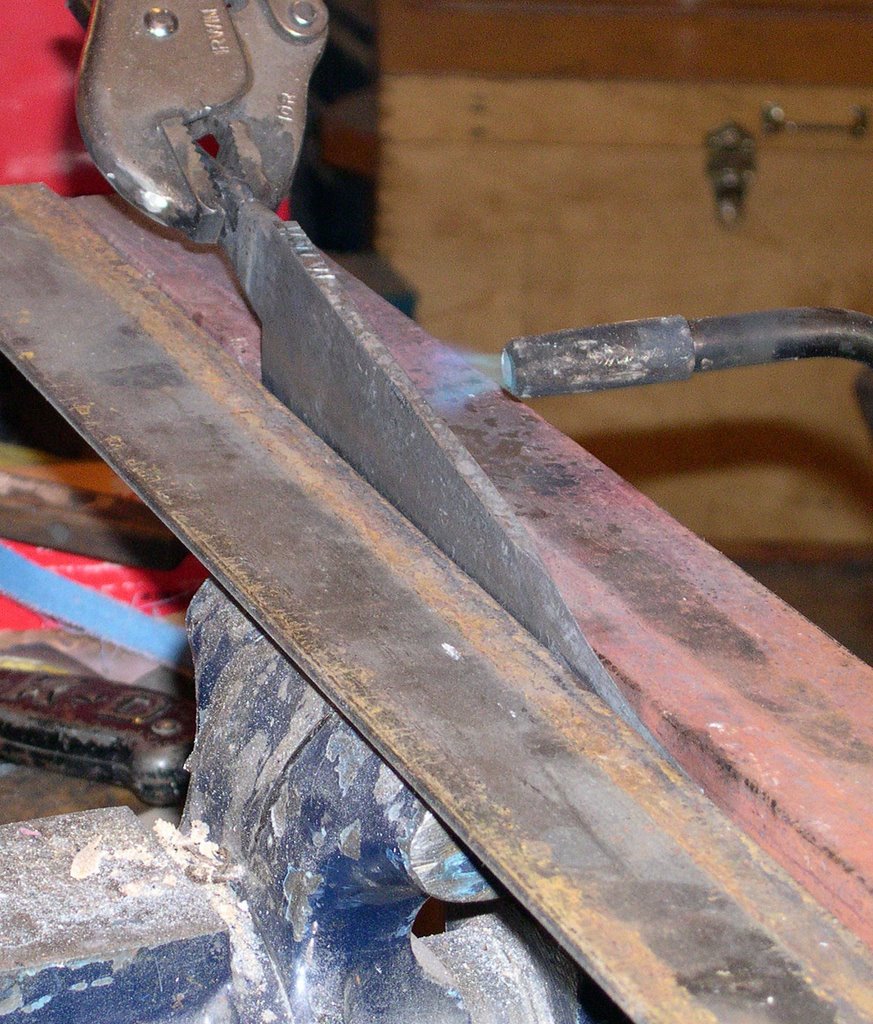 This accomplished by the method shown next. The blade is clamped, edge down, between two chunks of angle iron in a vise while the spine is heated. When the spine begins to change color the blade is taken out, and heating continues until the appropriate colors run down to the edge. I'd like to add that there are about a million ways of doing this, and they all work. This is just how it works best for me.
The handle on the original was rosewood which isn't as plentiful as it was back in the 1840's, so I went with the more cost-effective relative, Bubinga (AKA 'African Rosewood'). The tree of the Brazilian variety has the unfortunate tendency to produce bland colorless wood until it has lived a few hundred years.
 Bubinga is a bit more red but it ages to the same color in the end.
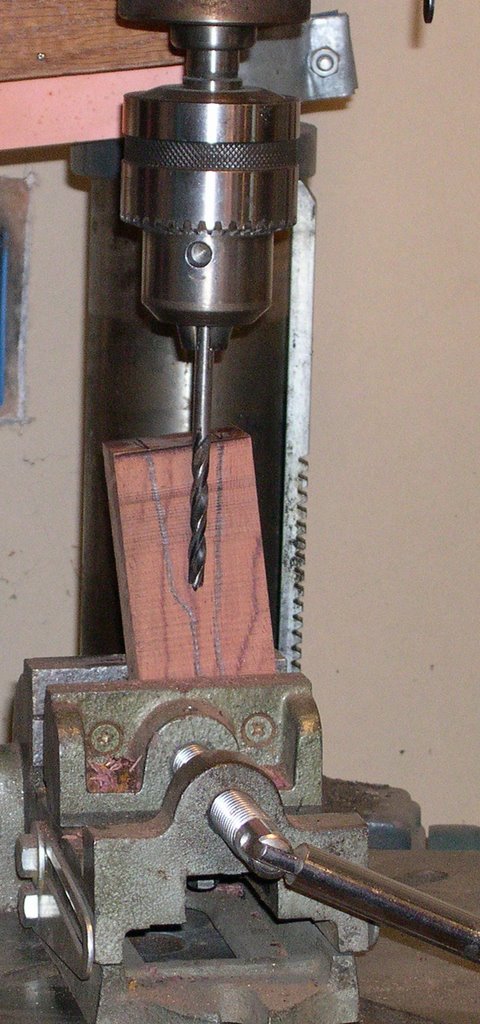
Next picture shows how the cavity for the tang is drilled out using a 1/4" brad-point bit. After as much wood as possible is drilled out, the blade is put in the vise and the tang is burned in. Finally we come to the end. The thing in its entirety, dry fitted together. The inset (lousy quality picture - sorry) shows the fiddly bits: the handle, ferrule/guard combo, side plates and that bitchin' hooked pommel.
Today's agenda includes putting together a sheath for it and putting it up for sale.


No comments:
Post a Comment